Explore this post with:

Shiplap siding is a popular way to make walls and ceilings look nice. It uses wooden boards that fit together in a special way, giving your home a cozy, classic, or even modern feel.
What is Shiplap and Why is it Good?

Shiplap is a type of wood board that has special cuts on its edges. These cuts let the boards overlap and fit together tightly when you put them up. People used to use it on the outside of houses to keep out the weather. But now, shiplap inside homes is very popular because it looks clean and adds a nice feel to any room.
It’s good because it makes your walls look interesting without being too fancy. It’s a pretty simple way to make a big change in your home, which is why many people use it for home makeovers. Knowing about shiplap helps you pick the right kind, plan how to put it up, and avoid common mistakes, leading to a great-looking and strong finish in your home.
Common Problems When Using Shiplap

Even though many people like to put up DIY shiplap themselves, some common issues can pop up if you’re not careful:
- Not Letting Wood Get Used to the Room: A big mistake is not letting the wood shiplap sit in the room where it will go for a few days. Wood changes size with heat and wetness. If you put it up too soon, you might see gaps or bumps later on.
- Bad Wall Prep: Putting shiplap on a wall that isn’t smooth or clean can make the final look messy. Bumps behind the boards will show, and a dirty wall can stop glue from sticking well if you use it.
- Wrong Nails or Spacing: Using the wrong type of nails or putting them too far apart can make the boards come loose, crack, or sag over time.
- Forgetting Space for Wood to Move: Even though shiplap fits tightly, you need to leave small gaps at corners and edges. This lets the wood expand and shrink naturally. If you don’t, the boards can buckle or crack.
- Poor Painting or Staining: Rushing the finishing process or using the wrong paint can lead to an uneven look, make it less strong, and hard to clean later. For painted shiplap, not using a good base coat can make stains show through.
What Makes Shiplap Look Good When Installed?

To make your shiplap look great and last long, here’s what’s important:
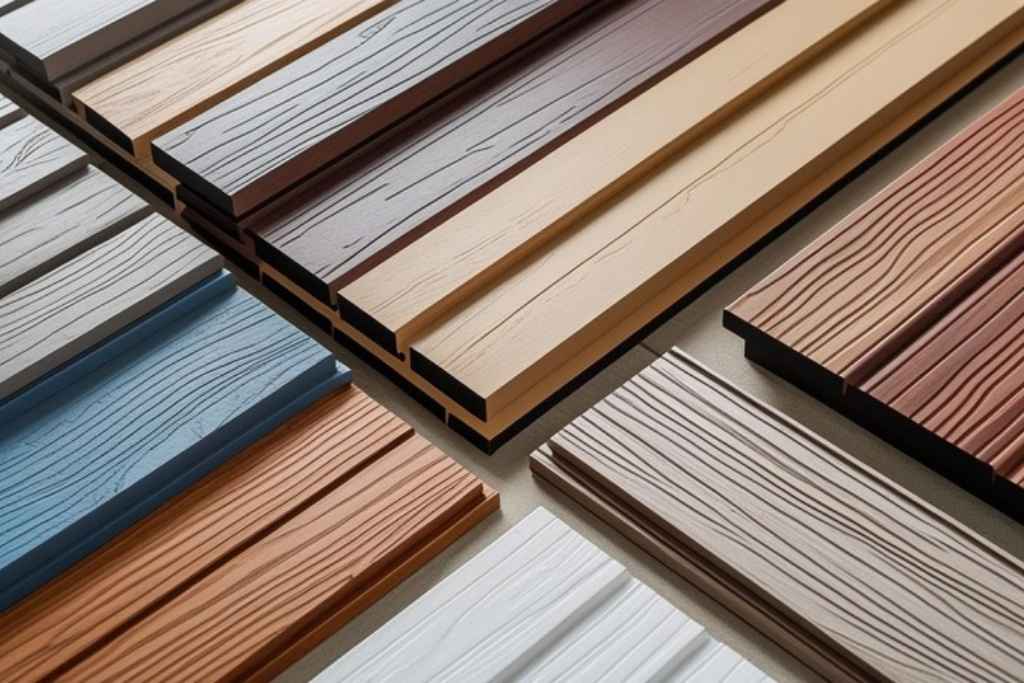
- Picking the Right Wood: The type of wood changes how it looks and how long it lasts. Pine shiplap is cheap and easy to work with, good for shiplap inside or white shiplap. Cedar shiplap naturally fights off weather and smells nice, so it’s good for shiplap outside. For an old-fashioned look, try reclaimed shiplap.
- Style of Gaps: Shiplap comes in different styles. Regular shiplap has a soft shadow line, while nickel gap shiplap has a clear, even gap between boards, giving a cleaner, more modern look.
- Direction (Side-to-Side or Up-and-Down): Horizontal shiplap is classic and can make a room feel wider, good for a farm-style or beach-house look. Vertical shiplap can make ceilings seem taller and add a special touch, great for an accent wall shiplap.
- Good Nailing: Using the right nails and nailing boards into the wooden studs behind the wall makes sure they stay put. Hidden nails can make it look even cleaner.
- Even Gaps: Keeping the space between boards the same is key for a neat finish, especially with nickel gap shiplap. Use small spacers to help.
- Nice Finish: Whether you paint your shiplap white or stain it a natural color, a good finish protects the wood and makes it look better. For outside, special paints and stains that fight weather are a must.
Tips Before You Start Your Shiplap Project

Before you grab your tools, it’s smart to get ready:
- Measure Carefully: Measure the space where you want to put shiplap to figure out how many shiplap planks or shiplap boards you need. Always buy a bit extra (about 10-15%) for mistakes.
- Pick the Right Kind: Look at different wood shiplap options (pine shiplap, cedar shiplap, etc.) and styles (nickel gap shiplap) to match what you want and where it will go (inside or outside). Think about the cost of shiplap for different materials.
- Let the Wood Get Used to the Room: This is super important. Store the boards in the room for at least 3 to 7 days before you put them up. This helps the wood adjust to the room’s air, stopping it from bending or gapping later.
- Get the Wall Ready: Make sure your wall or ceiling is clean, dry, and flat. Fix any big bumps. If you’re painting, especially white shiplap, put a coat of primer on the wall first.
- Get Your Tools: You’ll need a tape measure, a level, a stud finder (to find the wood frames in your walls), a saw, a nail gun (or hammer and nails), wood filler, caulk, sandpaper, and safety glasses.
- Plan How It Will Look: Decide if you want horizontal shiplap or vertical shiplap and where you’ll make cuts. Planning helps you waste less wood and makes it look good.
How to Put Up Shiplap – Step-by-Step

Here’s a basic way to put up shiplap correctly:
- Find and Mark Studs: Use a stud finder to find and mark the wooden studs in your wall. You need to nail into these for the shiplap to be strong. For shiplap ceilings, find the ceiling joists.
- Start Straight: For horizontal shiplap, begin by putting your first board up perfectly level at the bottom or top of the wall. Use a level to make sure it’s straight. For vertical shiplap, start with a straight up-and-down line.
- Attach the First Board: Nail the first board into the studs, making sure the nails go in all the way.
- Fit and Nail Next Boards: Take the next board and slide its cut edge into the edge of the board you just put up. Tap it gently with a rubber hammer and a small wood block so it fits tightly.
- Keep Gaps Even: If you want the nickel gap shiplap look, use a nickel or a small spacer between the boards to make sure the gaps are all the same.
- Cut Around Things: Carefully measure and cut boards to fit around outlets, windows, and doors using your saw.
- Stagger Ends: To make it look better and be stronger, don’t let all the board ends line up in a straight line. Instead, stagger them like bricks.
- Fill and Finish: Once all boards are up, fill any nail holes you can see with wood filler and sand them smooth. Then, paint (like white shiplap) or stain the wood. For strong shiplap that can handle weather outside, use good sealants and paints.
Mistakes to Stay Away From
- Not Letting Wood Get Used to the Room: This is a big reason for gaps and bending. Don’t skip this step!
- Not Finding Studs: Nailing only into the drywall won’t hold your shiplap walls or shiplap ceilings securely. Always aim for the studs.
- Not Starting Straight: If your first board is crooked, everything else will be off.
- Too Many or Too Few Nails: Too many nails can split the wood; too few won’t hold it tightly.
- No Plan for Cuts: If you don’t plan where to cut, you might end up with odd short pieces or waste a lot of wood.
- Forgetting to Finish Edges: Don’t forget to use caulk or add trim for a neat look, especially with painted shiplap.
Checking and Improving Your Shiplap Project
Seeing how well your shiplap project turned out is mostly about how it looks and how long it lasts.
- Look at It: Check your shiplap regularly for any bending, gaps, or cracks. See if the gaps are even and if the finish is smooth.
- How Strong It Is: For shiplap outside, look for any water damage, rot, or peeling paint. Strong shiplap that resists weather should hold up well.
- Easy to Clean: Good shiplap with a proper finish should be pretty easy to clean. If dirt sticks or the surface wears out fast, it might mean the finish wasn’t good.
- Are You Happy?: Most importantly, do you like how it looks and feels? Does it match the design ideas you wanted, like a farm style, modern look, or beach feel?
- Care Plan: Make a routine for fixing shiplap and cleaning shiplap. For outside shiplap, this might mean repainting or re-sealing it every few years.
Conclusion
Shiplap siding is a classic and flexible way to make your home look better. Whether you want shiplap walls, shiplap ceilings, or just an accent wall shiplap, knowing about the different kinds of wood shiplap (like pine shiplap or cedar shiplap) and how to put it up will help you get a great, long-lasting result. Remember to let the wood get used to the room, measure carefully, and put it up correctly to avoid common problems. With good planning and care, your shiplap project will truly make your home more beautiful.
Related Content:


