Explore this post with:

Need to update the look of your bathroom, but don’t have a lot of time or money? Bathroom refinishing is an easy and affordable option that will give you the opportunity to change all of the fixtures in your bathroom. You can either do this yourself, hire a professional, or get help from family members.
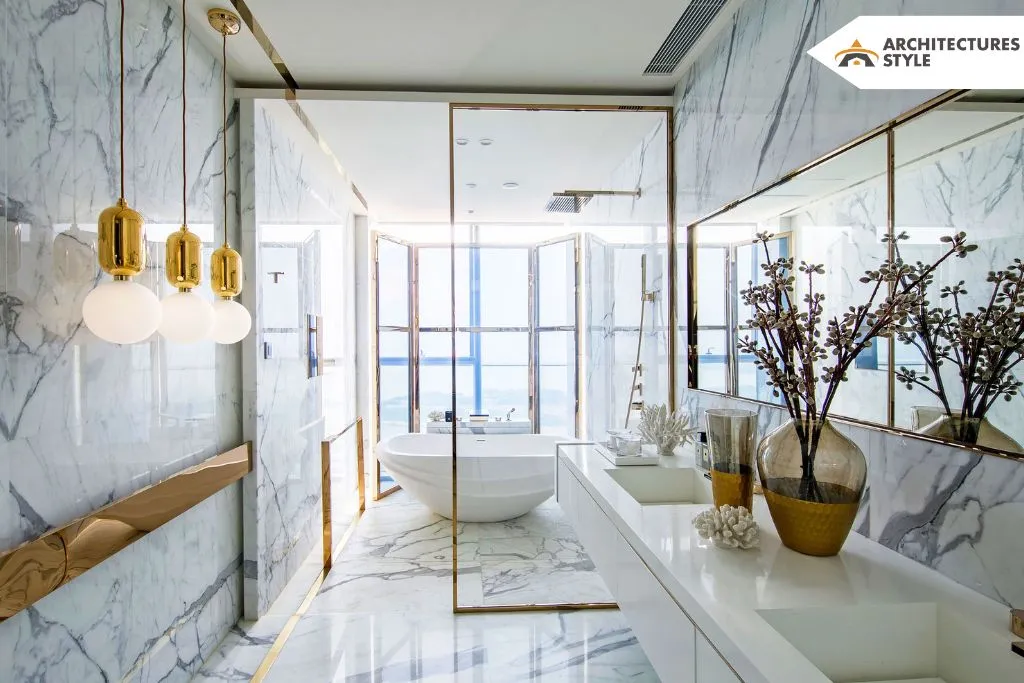
This guide will show you how to choose fixtures for your bathroom and then walk through each step necessary for completing a successful bath remodel.
What Is Bathroom Refinishing?

Bathroom refinishing is the process of removing all fixtures from a bathroom and replacing them with new ones. This includes everything in your bathroom, including tiles on the floor or walls, cabinets, faucets, showerheads, and more. Bathroom remodeling can be done by an individual who has some experience doing this type of project themselves or by hiring someone to do it for you.
The first step before starting any work on your bathroom renovation is choosing which fixtures will go into the new remodel. You may want to change out items based upon how old they are; as well as adding features that were not present in other areas of your home – such as upgrading a bathtub without changing its size so that children still have room to play.
You also need to decide on the type of tiles you will use for flooring or walls, which cabinets and countertops you prefer, what kind of tubs and showerheads best suit your needs as well as how many toilets are in your bathroom.
The next step is removing all fixtures from a bathroom and replacing them with new ones. This includes everything in your bathroom, including tiles on the floor or walls, cabinets, faucets, showerheads, and more.
Bathroom refinishing can be done by an individual who has some experience doing this type of project themselves or by hiring someone to do it for you. If you choose to renovate yourself then know that before starting any work it’s important that the surfaces are completely clean.
If you choose to renovate yourself then know that before starting any work it’s important that the surfaces are completely clean.
Eliminate all dirt deposits from tile grout lines as well as sealers used previously so they don’t interfere with future coatings applied during the renovation process (Cleaning tip: Use diluted bleach). Be sure not to use strong cleaners as these can damage the surface.
Once you have removed all dirt deposits and sealers, rinse surfaces off with a pressure washer to remove any residue from the cleaning process then allow them to completely dry before applying new coatings or tiling. Note that some tiles are sensitive to moisture exposure so it’s important not to rush this process.
Onto the renovation phase itself: the first start by drilling holes in tile grout lines for fasteners of various shapes (plugs) then apply adhesive according to manufacturer instructions followed by resetting tiles into place using spacers where needed.
Next drill holes through the floor if there is no underlayment or membrane present such as vinyl when the mortar has accumulated over many years causing carpets or other soft materials to become stained and ruined. Remove this mortar with a hammer drill or chisel pliers, then sand the floor until smooth and even before applying fresh adhesive and new tiles if desired.
The Process of Bathroom Refinishing

- Start by removing all fixtures and fittings such as the toilet, bathtub, sink, etc. This will allow you to clean and seal behind them which is important for a good outcome later on.
- Remove old tiles from the floor using either power tools or traditional crowbars with careful attention given not to damage any adjacent surfaces when doing so. If there are underlayments present then be sure that they remove too in order to provide a thorough surface preparation before installing new ones if necessary.
- Clean up after yourself: sweep out dust, vacuum thoroughly including baseboards where needed; use an antiscale solution like Jomax Bathroom Antiscale Treatment Spray; wash the walls with Tilex Bathroom Surface Cleaner Rinse to kill the bacteria that could cause mold or mildew.
- Apply a sealant, like Miracle Sealants Bathroom Surface Coating, and allow it to dry for at least 12 hours before installing new tiles in order to ensure effectiveness. This will also help prevent any minor surface damage during installation from becoming an issue later on.
- Lay down your underlayment material of choice as per instructions included with the product then install flooring according to the manufacturer’s specifications (e.g., QUIKRETE® Quikrete 5000 Porcelain Tile Adhesive) while being careful not to overwork adhesive so that there is enough left behind for the final grouting stage which should happen within 24 hours after tiling has been completed: this will help avoid any potential issues with peeling or lifting tiles.
- Apply a final coat of sealant for added protection and to ensure surfaces are easy on feet (e.g., Miracle Sealants Bathroom Surface Coating).
Signs That You Need a New Coat of Paint in Your Bathroom
- You notice cracks and chips in the paint.
- The color is no longer appealing to you or it’s outdated when compared to other rooms of your home.
- An odd odor lingers in certain areas due to mold, mildew, or bacteria buildup on surfaces (e.g., sinks).
- There are signs that moisture has been present such as discoloration and watermarks on walls.
Types of Finishes and What They Mean for the Homeowner

- Gloss: Provides a wet look with an intense shine. Adds to the cost, but lasts longer and has low maintenance costs when compared to other finishes.
- Satin: Provides a soft sheen that’s not too shiny, making it appropriate for any room in the home.
- Semi-gloss or eggshell: Has some luster without being overly reflective like glossy paints are; this is great if you want something that looks clean while still adding a touch of glamour (e.g., Benjamin Moore White Dove).
- Flat/Matte: The classic finish on walls in many homes due to its lower cost and versatility is one of the most popular choices among homeowners today. Can use anywhere from kitchens to bathrooms depending on the desired finish.
- Stain: The original way to get a rustic look and can be applied in any color. It’s easy to apply but requires more care than other finishes as it is prone to water damage if not sealed properly.
- Stenciling or Sponging: Using this low-cost technique on walls will give you the aged effect of an old brick wall without all the work that goes into laying bricks; though there are many intricacies involved with stencils so make sure they’re done by someone who knows what they’re doing!
Discover More:


