Explore this post with:

Resin is a one-of-a-kind substance that has been used for ages. It’s a liquid substance that hardens when exposed to UV light or when a hardener is added to it. When a strong bond is required, resins can be employed as adhesives and coatings in construction and building. Other common uses include floor and wood lamination, soil sealing, cutting boards and kitchen counters, automobile parts repairing, medical devices, etc. Wood and Epoxy Resin come with a wide range of applications and are preferred for how durable they are and easy they are to work with.
Epoxy resins, which are two-component systems consisting of a resin and a hardener, are one of the many types of resins available. Epoxy resin is a form of epoxide-based reactive prepolymer and polymer. The chemical reaction for making epoxy resins was discovered sometime around the 1930s. Once its use started taking off for industrial use in the 40s or 50s. It also started becoming popular for its use in art, jewellery and furniture.
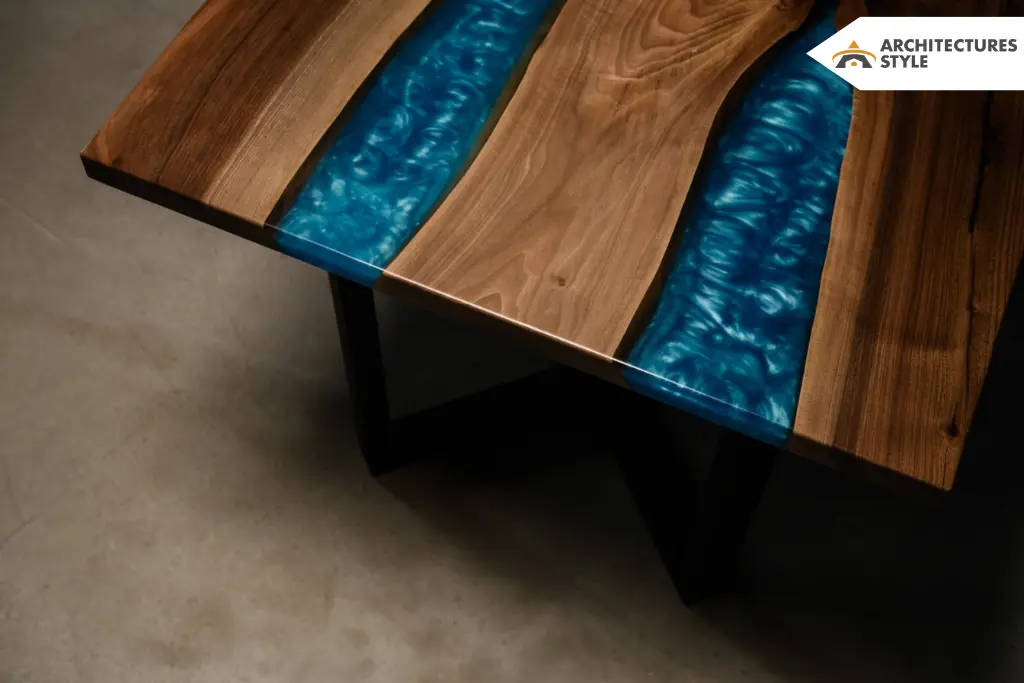
Epoxy resin is eye-catching, luminous and shows depth. It gives everything a glossy, clear, glass-like finish, and has started becoming popular in recent times for how attractive it looks. It has recently become a new trend in the interior design world, with more and more people buying, and even making their own furniture and decor with wood and epoxy resin. Some popular examples would be a stunning wood and epoxy table, a resin lamp, a clock, or a cabinet.
This hybrid furniture made with wood and epoxy resin looks amazing, is easy to clean and maintain, and highly durable. So many people today have taken up DIY projects for making wood and epoxy furniture. The basic steps include creating a mould, pouring the resin, and letting it cure. Here are the detailed steps to make a stunning wood and epoxy table, popularly known as an epoxy river table.
Step 1: Research and Gather Supplies
The very first step of making an epoxy river table is reading up about the best techniques, figuring out your requirements, safety precautions needed, and the supplies one would need.
The supplies one would need are premium quality casting and laminating resin for the perfect finish; liquid colour pigment; MDF moulds; wooden planks, some preferably with a waney edge; tools including a chisel, a saw, clamps, torch or heat gun, and a sander; and safety equipment like gloves, respirator, goggles, and protective clothing.
Step 2: Preparing the Wood

The wood needs to be prepared for making the table before one moves on to epoxy. The bark must be removed, the surface must be sanded and levelled for a smooth finish, and all cracks, pores and uneven areas must be sealed with epoxy resin. The wood should be evenly coated on all sides with resin.
Step 3: Preparing the Mould
A mould made of MDF boards must be assembled before resin is poured. The boards should be carefully measured according to desired shape and size, and glued together, keeping the insides completely clean.
Sanitary silicone is one of the best options to seal the edges, avoid any leakage and keep the mould in place. The last step in mould preparation is to use a releasing agent, like silicone spray, Teflon spray, or release wax, so that the resin does not stick to the mould and can be taken out easily.
Step 4: Placing the Wood and Preparing the Resin

Once the mould is prepared, one can insert the wooden pieces in place. If the measurements were accurate and the mould was put together carefully, this step should be easy, and one can now move on to preparing the resin.
Preparing the resin is one of the most complicated steps in this procedure and must be done with careful consideration. All safety measures should be taken care of and gear must be worn before starting. It may be a better idea to cast the resin in layers instead of pouring it all together, to avoid boiling and bubbles.
A large bucket should be used to mix the components exactly as much and as instructed by the manufacturer. Air bubbles can then be removed with the help of the careful use of a torch or heat gun. Desired pigments can be added to the resin at this stage.
Step 5: Pouring the Resin and Letting It Cure

Final Thought
The final step is to pour the resin into the mould. The mould must place on a balancing surface and the resin can now pour slowly, avoiding the formation of bubbles and ensuring that its level. Once all of it is poured, the resin can be left to cure and harden. Curing can take a variable amount of time depending on the manufacturer.
Once cured, the mould can remove and stunning wood and epoxy tabletop are ready. This beautiful, glossy and hard table top can now be fixed on a base and placed in the house, giving it a classy look.
Discover More:


